So if not through a menu, how do you turn on Defender’s hidden adware blocker? The answer is through registry edits, which many aren’t confident with. Though you can get similar results with third-party software like Malwarebytes, the Windows Defender adware blocker is advanced, completely free, and can have less of a performance impact. We’re going to show you how to turn the anti-malware feature on without messing up your system. First, however, you should turn on automatic registry backups. This is another feature that’s disabled by default, but it gives you an easy avenue back, should you need it. With that done, let’s get on with the guide.
Enable the Windows Defender Adware Blocker
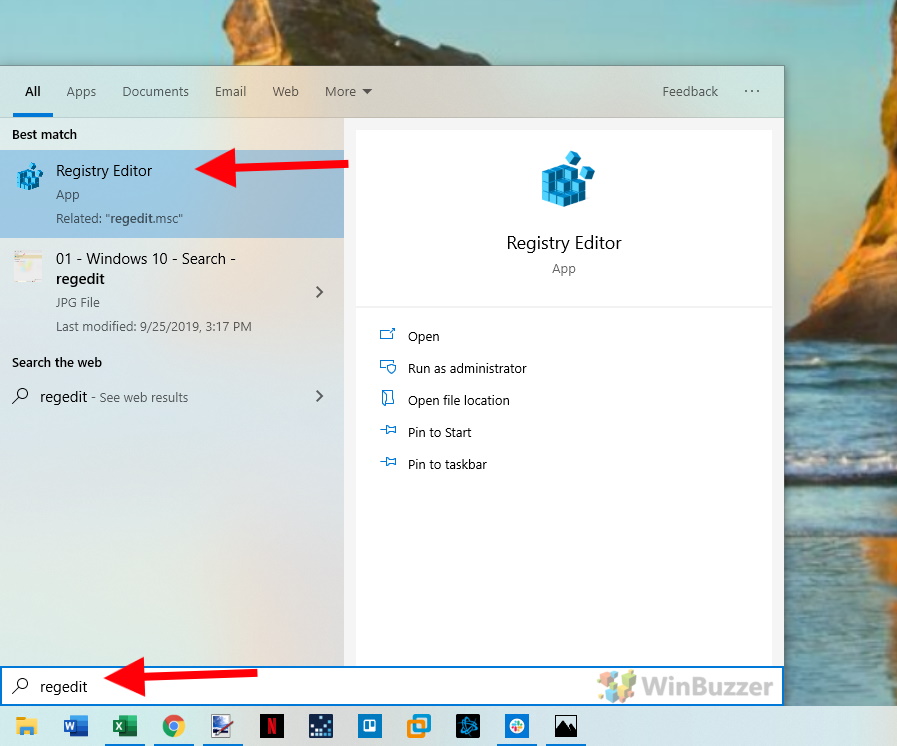
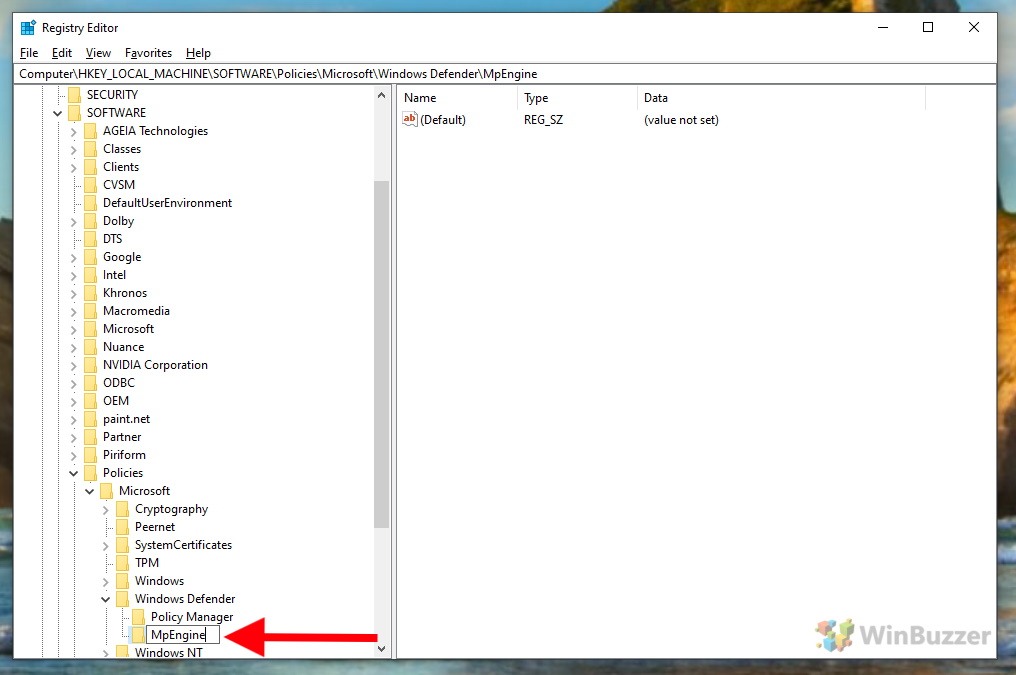
Press the Windows key and search for “regedit”. Click on “Registry Editor”. Find “Computer\HKEY_LOCAL_MACHINE\SOFTWARE\Policies\Microsoft\Windows Defender”, or paste it into the address bar. Right-click and choose “New > Key”. In the left panel, create a new subfolder called “MpEngine”. Right-click once more, but this time select “New > DWORD (32-bit) Value”. Name the value “MpEnablePlus”. Set the “Value data” to “1”. Press “OK”. Windows Defender’s anti-adware feature is now enabled. Feel free to restart your PC to ensure the changes have taken effect.